


The Secret to a Perfect Rear End
For those who have built a few airplanes this technique may not be new. But for those who don’t know it, learning this easy procedure may border upon being a life changing epiphany. Or, perhaps not. But it will certainly make your model crafting projects easier and prevent one from inventing new expletives that can’t be uttered in public! Most airplanes with a turtle-deck require the deck to taper to the rear of the fuselage on each side of the vertical stabilizer. This is usually done with tail faring blocks that are tapered and shaped. The trick is getting the blocks identical and symmetrical following the contour of the turtle deck. The deck should appear as a single piece flowing smoothly from beginning to end. With just a few steps you can have a perfect rear end! We’ll use the SIG Smith Miniplane as our test subject.
R/C Aircraft Insight From Low Altitude


Tail Slide Haven
Designs
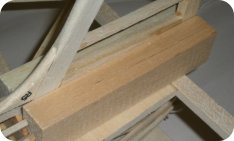
The instructions at this point say:
“(c) Epoxy the fin/rudder assembly in place-align carefully.
(d) Shape 3/4” x 1” x 5-1/8 tail faring blocks and glue in
place”.
.
Ugh! Shaping these blocks with the fin/rudder assembly in
place is no fun. We’re going to do it a different way.
The SECRET to a perfect rear end is to construct a dummy
elevator and dummy rudder to make the job easier without
the full size rudder and elevator being in the way.
Ensure the dummies are the same thickness as the elevator
and rudder. The dummy elevator piece should be flush with
the fuselage and follow the shape of the tail post. Both
pictured are 1/4”.
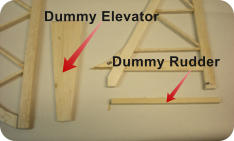
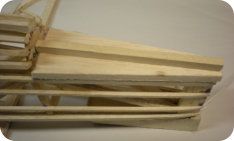
Tack glue the dummy pieces to the fuselage. I use just a
couple of small drops of CA glue. Carefully align the dummy
rudder so it’s centered and straight on the tail. If the dummy
rudder is crooked, the blocks will not be symmetrical.

Shape the blocks according to the plan side view and make a
elevator connector relief area if required. I cut the trailing
edge curve of the tail blocks on a band saw. Tack glue blocks
on the dummy elevator. I cut out the tail block detail from the
plan and marked the block accordingly.
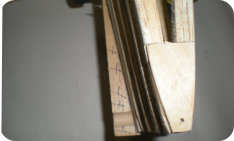
Turning the fuselage upside down, the area marked with an
“X” will be removed before the serious shaping begins. I used
a razor saw and razor plane to remove most of the area..
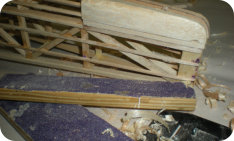
Time to get to work. Get out your sanding blocks, sand paper,
and razor plane. Concentrate on shaping the blocks flush with
the fuselage sides and the dummy elevator first.
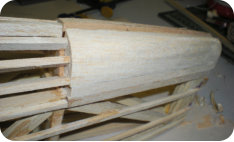
Almost there! Once the sides are flush, begin sanding the
curvature of the block to match the rear of the turtle-deck and
the fuselage taper. Go easy once you get close down near
the turtle-deck or deck stringers.
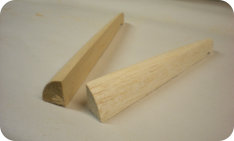
When the blocks are shaped to your satisfaction gently
remove the blocks and dummy elevator with a #10 X-ACTO
blade. As you can see, there isn’t much remaining from the
blocks we started with!

Once the dummies are removed, replace them with the
original parts, add the faring blocks and check for fit. Now
you can align the elevator/rudder assemblies and
permanently glue them to the fuselage. Glue the faring
blocks in place.
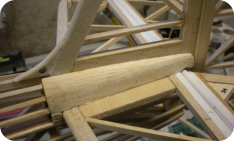
There it is. Symmetrical tail blocks that match the plan. The
whole process took about 20 minutes. Have fun!


Two examples of
tail blocks using
the perfect
technique.
John W. Blossick
Tail Slide Haven
johnb@tslidehaven.com
January 2021

tslidehaven.com
Top of Page


