
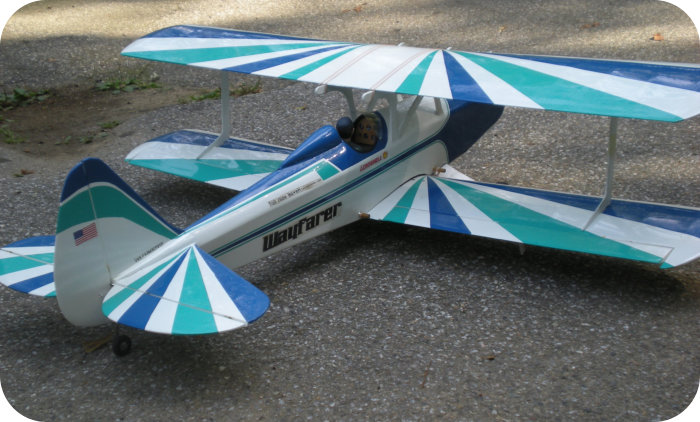
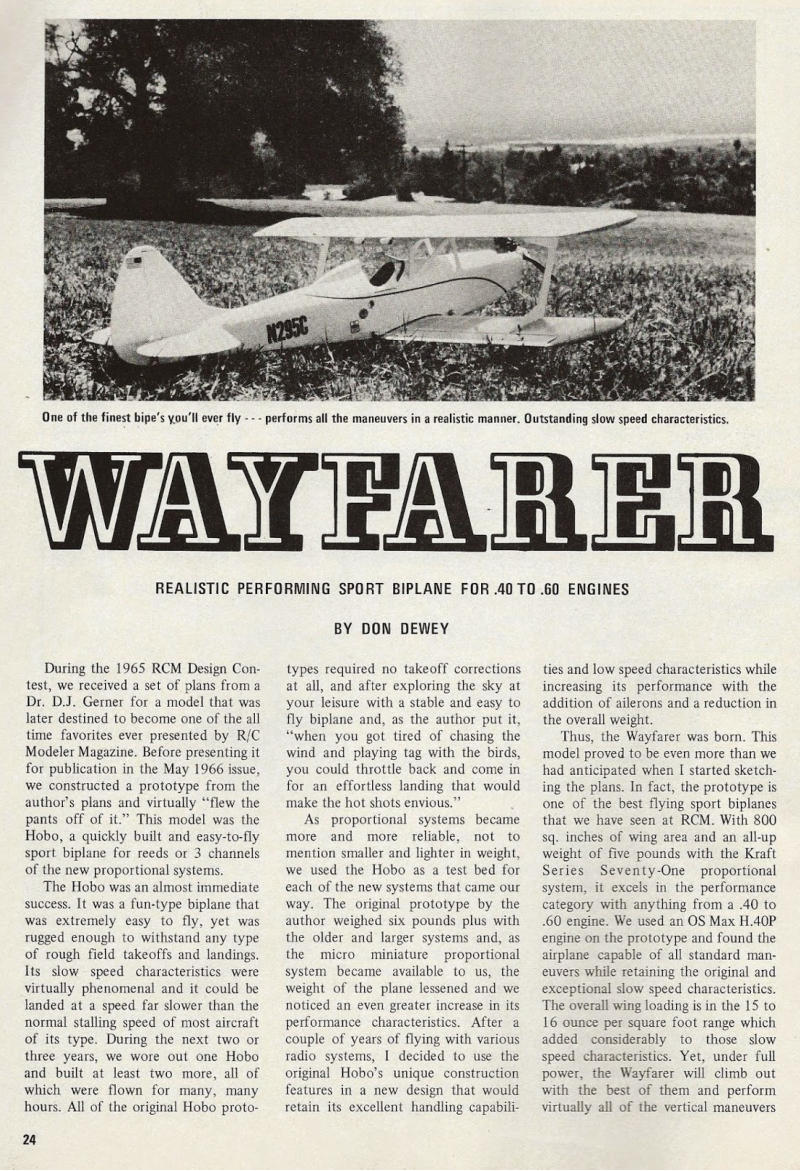
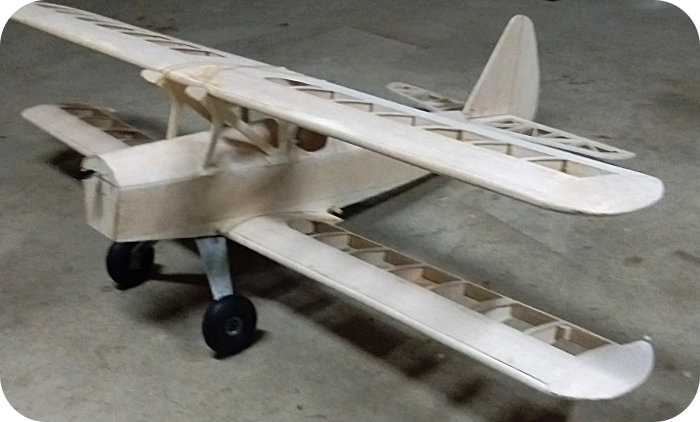
Wayfarer Build
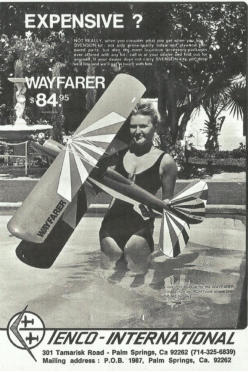
Why build the Wayfarer? First, the odds of someone else having this aircraft at the local field is just about zero. Second, No wires to bend for the upper wing cabanes. And third, I like biplanes. Designed by Don Dewey, the articles I read about how this bird flies were impressive. Fast or slow, with no bad habits, it seems to do it all well—I just had to build one. Derived from an earlier airplane called the Hobo, the Wayfarer is a well tested platform. The airplane was also kitted by Tenco- International and Svenson in years past. Svenson also kitted a smaller version of the Wayfarer called the Twinny. Wayfarer assembly is straightforward with few parts to cut out.


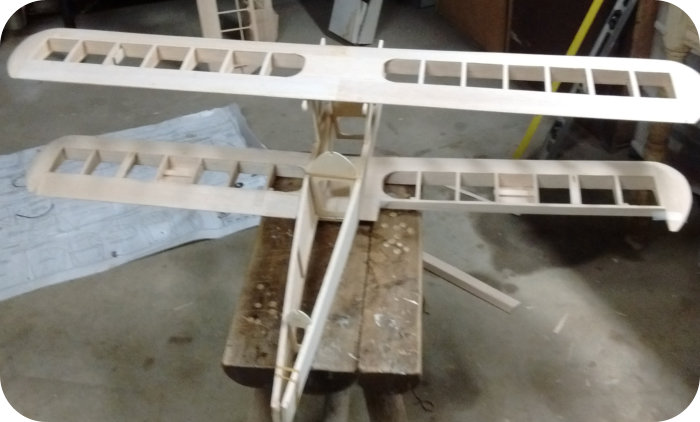
Wing Assembly
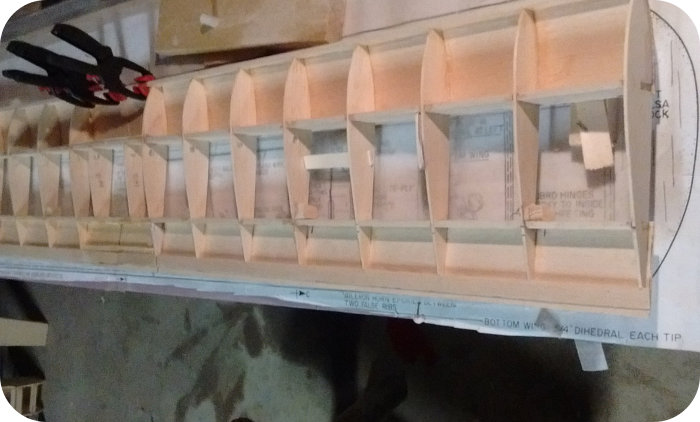
Bottom wing dihedral braces being glued to spars while setting dihedral. Wing construction is egg crate style. Notches in the ribs, and notches in the spars make the egg crate. It was my first time with this type of wing construction. It worked OK. Using a jig would have made it easier. .Top View
Fuselage was rubber banded together to check for fit and alignment. Top stringer and F5 to be added to center section of aft fuselage. 1/4 inch spruce stringer will be fitted to top of formers to support turtledeck sheeting.Another Top View
Fuel tank is basically a permanent installation. Setting up the tank and installation is easily done before forward fuselage sheeting is completed.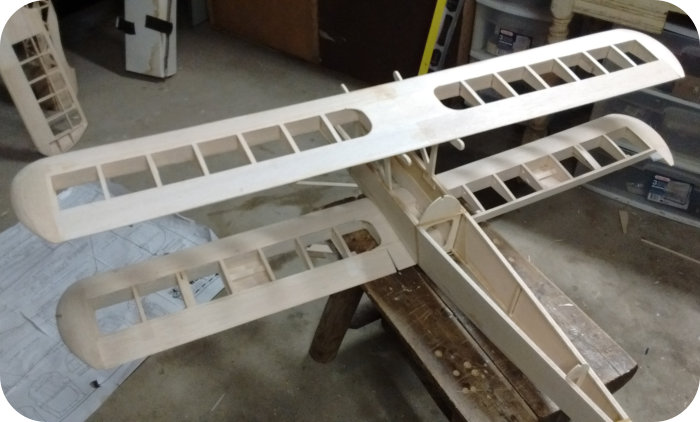
Aft Fuselage Sheeting
Installed
Headrest was cut from glued balsa
blocks and sanded to shape.
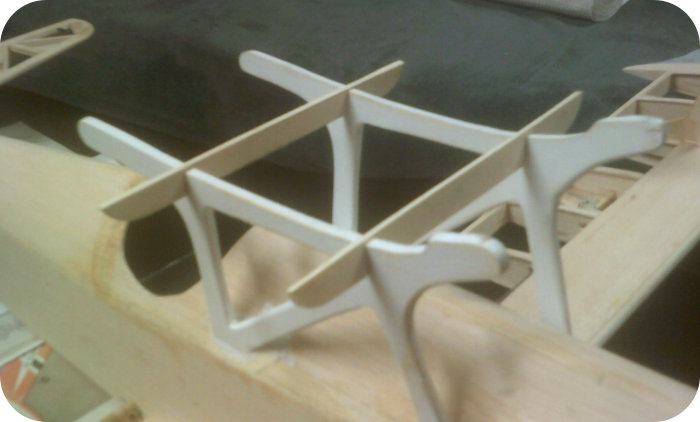
Top Wing Mounts
Horizontal supports will be permanently
glued and painted after covering. It will
make covering much easier. Reliefs in
top sheeting were filled with mixture of
Zap Z-Poxy Finishing Resin and micro
balloons.
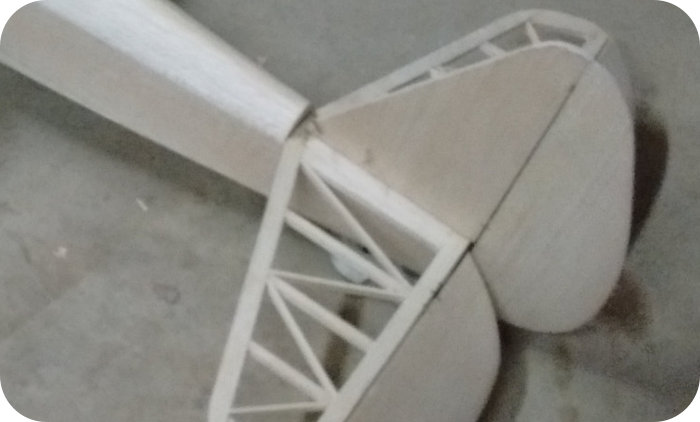
Tail Section
Tail pieces pinned in place. Fairing
blocks will need to be shaped.
Gussets were added to horizontal
stab. It flexed a bit more than I liked
after assembly.


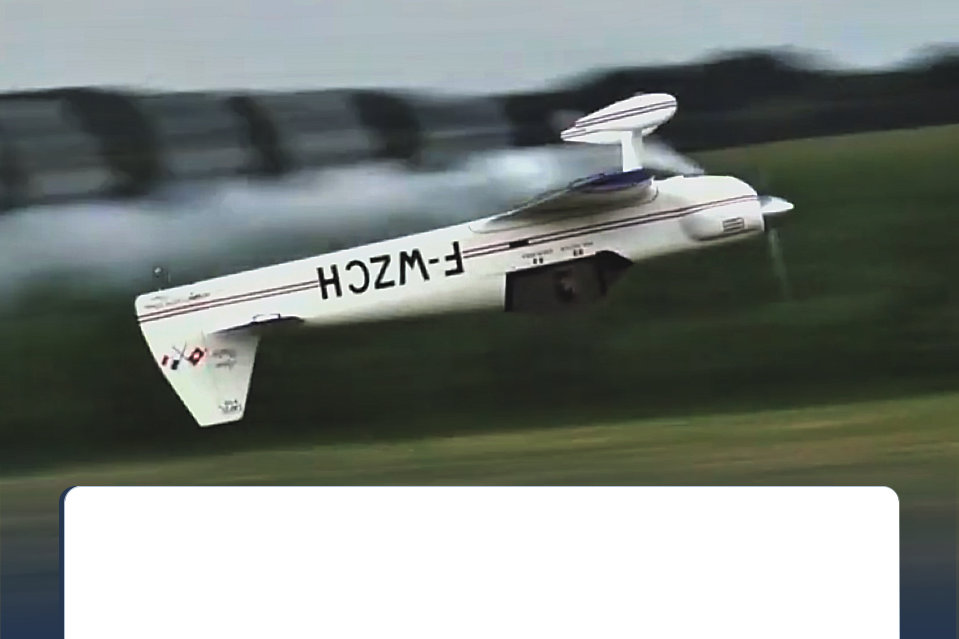
R/C Aircraft Insight From Low Altitude
Business End Of The Wayfarer
Power up front will be handled by a
Saito 56. It should fly the aircraft
quite well Not looking for unlimited
vertical here, just an easy relaxed
flier. I want to take advantage of its
slow speed qualities.

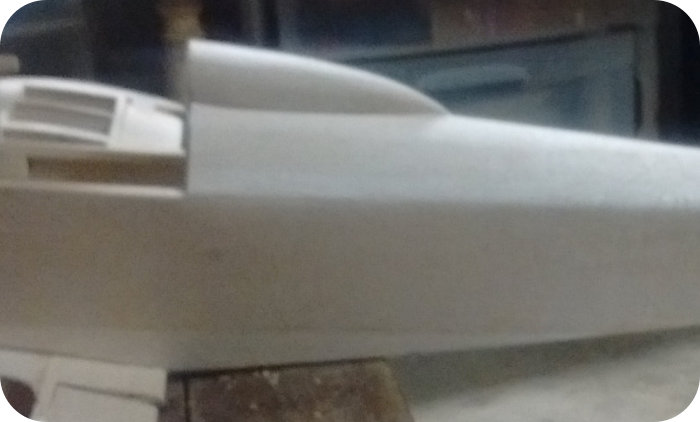
Front Sheeting Added
3/32 sheeting was dampened, bent
to shape and glued over front
fuselage formers. Landing gear was
cut from aluminum and bent to
shape.

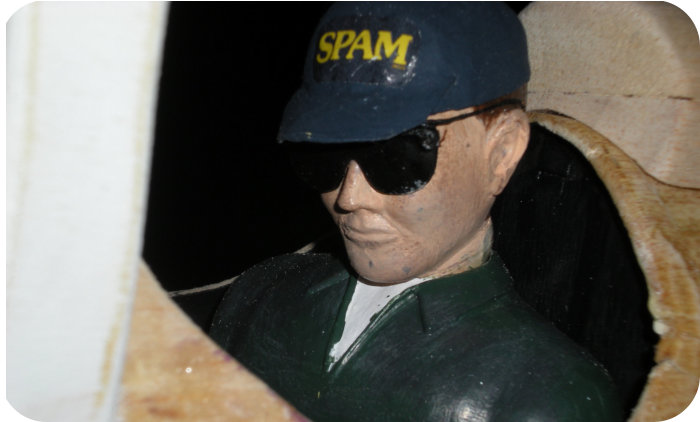

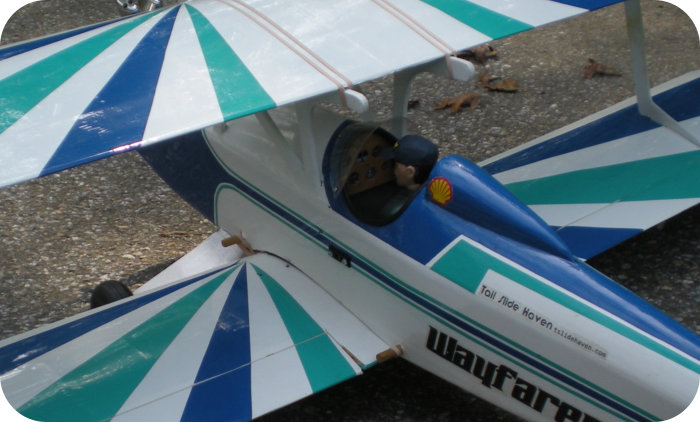
Wayfarer Pilot
Yep, the Wayfarer pilot happens to
be a big fan of Spam. Cap was made
with paper mache. Flour, water, and
newspaper. Thin cardboard for brim,
cut to shape, then glued to cap.
Fly Safe!
John W. Blossick
Tail Slide Haven
johnb@tslidehaven.com
May 2018
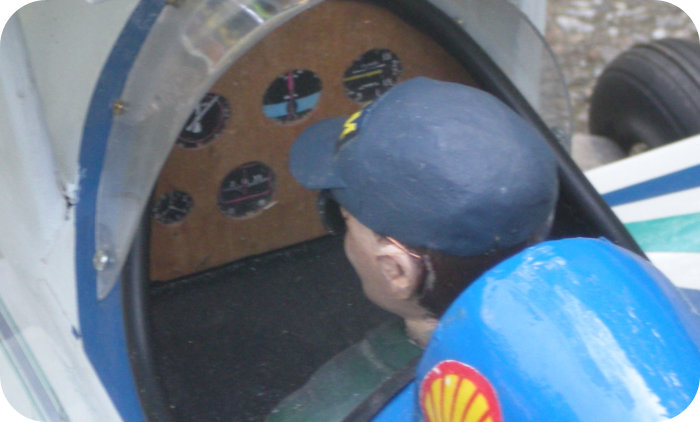
Cockpit Detail
I put together a quick cockpit dash
using a JTEC instrument kit and
stained the plywood.
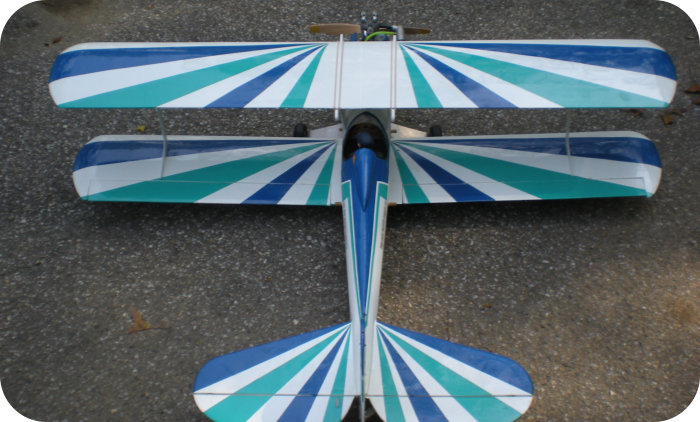
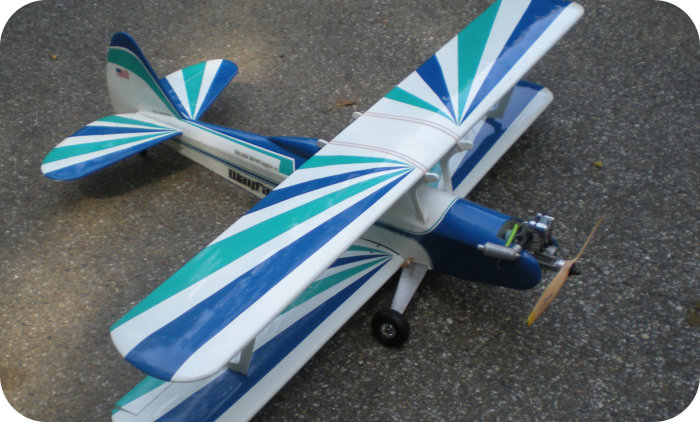
Covered!
Ultracote was used for covering.
Turquoise and a medium blue were
chosen for the covering scheme.


Find The Best Deals In R/C
More Build Notes and Maiden Flight
There’s hardly a completed build where I wish I had done a few things differently. The
Wayfarer was no exception. If I were to build another one, I’ll add a removable top
tank hatch as shown on the Svenson plan. If using a 4 stroke engine again, I will set
the firewall back about 1 1/4 inches to compensate for the weight and length of a 4
stroke engine vs. a .40 two stroke engine. I had to add weight to the tail to balance
the airplane, which is unusual for a tail dragging biplane.
Also, I lowered the Saito .56 about 1/2 inch from the plan thrust line to make it sit
better in the airplane. The thrust line is fine for a two stroke engine but the 4 stroke
sat too high (at least to me), on the engine mounts and just looked stupid. In flight the
airplane doesn’t seem to care. No major elevator trim is necessary for level flight.
Next, I would probably trash the aileron bell cranks and go with dual servos for the
ailerons.
And finally, if you build a Wayfarer, use solid med hard, to hard balsa on the
horizontal stabilizer. Do not use the open framework as shown on the plan.
I’ve read of horizontal stabilizer failure on this airplane and figured I would add a few
gussets to the framework to be safe. It didn’t really help.
On the maiden flight the Wayfarer tracked nice and straight with a touch of right
rudder and was off in about 30 feet. I was climbing out, left hand turn, level off to
check the trim, and started another left turn to bring the ship around. That’s when the
problems started.
After gently banking to the left and easing in the up elevator to turn, the airplane
would roll in the opposite direction. I was able to level the plane off and bring it over
the runway. I made another circle around the field but it seemed to be getting worse.
Every time I moved the elevator the airplane would roll. Time to land!
Using throttle to control descent, I came in a little hot, landing in the grass and ended
up just breaking the propeller. Upon checking the airplane after landing, the horizontal
stabilizer would flex when the elevator was moved up or down. The Horizontal
stabilizer would also flex just by holding it and giving it a little wiggle. Not good.
Instead of cutting the airplane apart and replacing the stabilizer, I decided to remove the bottom covering and fill in all the open areas of the stabilizer with 1/4 inch balsa. After sanding it all flush, I fiberglassed the bottom of the stabilizer with 3/4 oz cloth and recovered it. Now there is no flex whatsoever in the stabilizer. Any weigh gain was negligible, only 3/4 ounce of tail weight was still needed to balance the 5 pound airplane.On most models, stab/elevator area is about 17-18% of the total wing area. Although I
haven’t done the calculations, the Wayfarer horizontal stabilizer and elevator just
looks unusually large—perhaps 20% of the wing area or more. It should be stressed
accordingly.
In any event, I highly recommend deviating from the plans on this one by using solid
wood for the horizontal stabilizer.
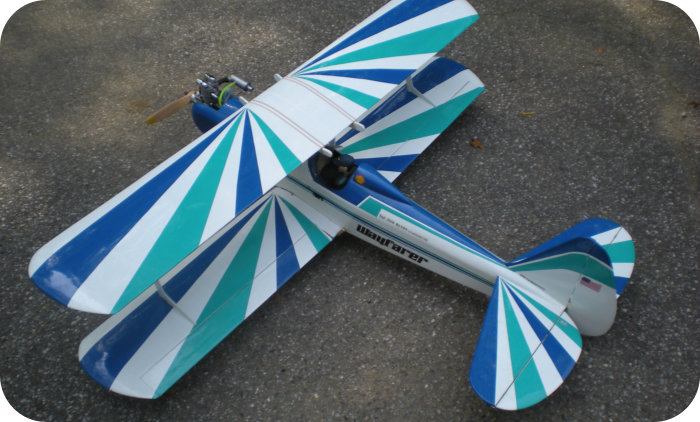
Wayfarer Biplane


tslidehaven.com
Top of Page
